I am sure you may have other tips that work better for you and I am sure that there are more than just 10. But, I am sharing here what I usually do and hopefully this will help those who want to take better pictures of their children. Few of the tips below are applicable only for an SLR camera, but most of them are applicable for a point and shoot too. You can also view more collections of children and family photography on my Masakecil Photography website.
So here they are in no particular order.
1. Be patient
Children are usually active and not always willing to listen to instruction, so they are the boss during the photo shoot. Talk to them, build the connection with them during that short period, so they are comfortable with your presence. Watch them and be prepared with your camera for the good moments. Photos will usually come out more natural and will show the children as children in their own world.
2. Photograph them playing with their toys
Children are usually very attached to their toys, especially their favorite ones. Photograph them while they are playing with them and look for those moments that show the connection between them and their toys. If you want to, you can exclude their faces and focus on their hands while playing with the toys.
3. Watch the Foreground and Background
Unless there is a special purpose, avoid shooting in environments with unwanted cluttered foreground and background if you can. Note that the keyword here is “unwanted”. So if you want a toy or part of a toy to be in the picture to add more stories to the image, by all means do it. Pay more attention to have clean background. Avoid having something vertical behind them that will look like as if it’s getting out from their head. Your main subject of attention is the children, hence removing those unwanted objects helps to emphasize your subject of attention. If you are outside at the playground in the park and you want to photograph the children playing, you can do few things to get a better picture:
- Move closer to them to isolate them from the busy surroundings and include part of the playground setup to still give a sense that they are playing at the playground. You don’t have to include the entire setup of the playground.
- Choose an angle where the background that is just behind them is clean or cleaner. Again, avoid vertical bar or pole behind the child’s head.
- Zoom in or use a longer lens to isolate the child from the surroundings
4. Color does matter
If you know the place you are going to, plan better by choosing a good combination of colors between the children’s clothes and the background/surroundings. Avoid wearing the same/similar color with the surroundings, as it will make the children less prominent in the photo.
5. Shoot during early morning or late afternoon
When shooting outdoor, do it during early morning or late afternoon when the angle of the sun is low and the quality of light is better and softer and the shadow is not harsh. If you have no choice but shooting while the angle of the sun is high at noon time, try looking for a shady place under the trees or where the sun is blocked by tall buildings.
6. Use window and/or curtain to diffuse the light
When shooting at home, try to position the child near the window with his/her face facing the window or having one side of the face lit by light from the window. If you have thin white curtain, use it to diffuse the light even more and create softer lighting if needed.
7. Focus on the eye(s)
When shooting portrait, the eye(s) should be in focus. When you are shooting at an angle to the face, focus on the eye nearer to the camera. Hence, select your focus point upfront and be prepared to move it quickly as the child moves.
8. Look for expression, emotion and relationship
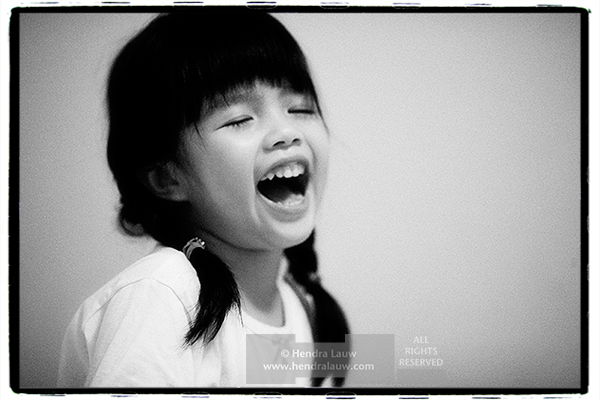
Capturing the children’s expression, emotion and their relationship with the parents or friends will help make a better photo and tell a story. So look for those funny faces, giggles, laughter and even cries.
9. Rule of Third
Play around with the composition. If you are used to photographing the child by placing them in the center, try different approach now. Position them off-center by following the rule of third. See image below. Position the main subject at either one of the four intersections.

10. Eye-Level shooting
Photographing children from a high angle creates an unpleasing perspective. Bring yourself down on your knee, or even on your tummy to be at the similar eye-level as the child.
Now, extra three last tips for you.
11. Understand your camera
Read the manual and learn how to use your camera optimally. Practice often to play with the setting, switches, buttons, etc, so it becomes second nature and you can operate it fast when you need to change the setting to adapt to certain situation.
12. Use manual exposure setting
If you are like me who prefer not to use flash, set the camera exposure mode to manual especially when the lighting is constant. Follow these steps to decide:
- do I want more of the background or do I want the background to be completely out of focus? This will determine what aperture you will use.
- after deciding what aperture to use, check if the scene can give you fast enough shutter speed to handle the subjects. If children are running and moving actively, I usually ensure that my shutter speed is at least 1/250 sec or faster depending on the speed of the children movement.
- if shutter speed is too low to freeze the subjects, increase the ISO so you can get higher shutter speed setting.
- if shutter speed is still too low after increasing ISO to the max, you may want to go back to point no. 1 and compromise by not getting more of the background. Use the largest possible aperture you can for the lens.
- if all have been done and nothing else you can do, don’t be discouraged, be prepared with your camera and press the shutter button when the children is at the peak of their movement, when there is usually a brief moment of freeze
13. Have fun and take LOTS of pictures
After reading all the above, I am going to tell you that rules are created to be broken. So, don’t be too stressful about following the guidelines. It may deter you from liking the process of photography. Just take LOTS and LOTS of pictures. As you review them one by one on your computer monitor, you will learn what works and what does not. Be brutal to yourself when you are learning. View the photo at 100% on your computer monitor to be able to see if it is sharp or the focus point is where it should be. Review the composition and play around by cropping the photo and see which one works best. As you learn more and practice more, you will notice that you will tend to CREATE the image in the camera right in the first place. It will become second nature as you progress. Photography is fun, so have fun. If you need to break the rule in order to create an image that you think will have great impact, by all means, do it.
Hope you find these useful and keep shooting.

Absolutely fabulous and insightful tips Hendra,keep it coming !!
Hi Gary … thank you so much. Hope they are useful for your day to day shooting. Best wishes.
Hello, came by your blog while browsing… Thanks for sharing those useful tips! And your photos are great, wish I could shoot like you!
Hi Jus … thank you. I am sure you can. Just keep shooting and shooting. Don’t worry about making bad pictures … you will learn more along the way. And you know what … the moments captured is more important. The technicalities will come later as you shoot more. So, don’t miss the moments. 🙂
Thanks for the tips..especially tips # 12.
Do you have tips on ‘how to avoid blurry photos’? I heard there’s a lens that i can purchase? can you recommend? thanx
Hi, I came across your site from typing “children photography” from google. Thank you so much for the quick notes from these very useful tips for a very newb dad hoping to catch one or two timeless moments of my two boys with a new DSLR.
Thank you very much again,
Best regards,
A
HI Andy … thank you for coming here and glad to know the tips are useful. Have fun shooting with your new DSLR. I am sure you will be able to capture lots of timeless moments of your boys. Just keep shooting.
Best wishes.
Thank you…!!! very well explained
🙂
Hi,
I was googling for tips and came across your web-site by chance. I use a Nikon D50. f-stop at 3.5… still some pictures of my baby turns out blur when he moves.
Should I be using A mode instead?
Rachel
doing a shoot with children tomorrow and wanted a few tips on what to do. came across this post and although I already had all the tips in my mind, it is nice to be reassured so thanks for the good post. also the lat point is by far the most important.
Glad you found it useful, Justin. Hope your shoot went well.
i like all the tips to help Me
Hi Zahria, glad that they are useful. Thanks for commenting.
Great website with good photo tips. Visit my squidoo lens at: http://www.squidoo.com/tipsforchildrenphotography